Would you like to make this site your homepage? It's fast and easy...
Yes, Please make this my home page!
Setting up the hard disk can cause many headaches or very embarrassing consequences if you are not careful in what you are doing. For instance, If you pull a mistake in the beginning of the setup process then you might not realize that your computer only recognizes 512Mbytes of your 20Gig hard disk. This can be very disastrous if it was a client computer and he just realized it when he got home, that would make you look very bad.
|
|
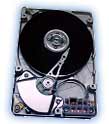
The best way to start off is with your computer off and all cables and drives out of the computer case so you can work at your best, there is no need to make things more confusing then they already are. Now looking at the hard disk you will want to write down all the "dimensions" or settings of the hard disk, this can prove very valuable in the future if your computer doesn't have an auto-detect feature or you just want to archive the settings.
Example of finding the disk drives dimensions
|
|
Next step is to set all the jumpers to the proper settings, the disk you are booting off of should be set to "master" and any other hard disk or CD_ROM on the came cable should be set to "slave". This is the last step in the hardware configuration and all drives and cables should be neatly attached and plugged in properly.
|
|
Restart you computer and when you see the numbers in the top left of your screen incrementing you will want to look in the lower left side which will display "Press ??? To Enter Setup". Where the ??? will be the key that you will press to enter setup, Phoenix BIOS requires you to press F2 while Award requires the Del key. There is a saying in this field "the only consistent things with computers is inconsistency".
Once you have entered setup you will have to locate the hard disk setup screen, sometimes it is under "Auto detect Hard Disk" and sometimes it is on the screen when you first enter setup. If the computer does not support Auto Detect then you will have to enter the settings manually by doing the following.
[1] Set the IDE Adapter mode to Auto
[2] Enter the heads, cylinders, and tracks
[3] If the option available you must set the mode to LBA
[4] Save the changes and exit
BIOS details
|
|
Now you should place an installation or boot disk into the floppy drive and restart the computer. When you are prompted with the A:\> type fdisk and press enter. In FDISK you are setting the partition information which is one of the most confusing part of the setup process. In FDISK you will want to select [4] Display partition information, if you see a partition present and with the right size then you will exit and proceed to the format process.
If no partition is present then you will want to create one by going to the main window and choosing [1] create primary partition, this will ask you a few questions about the size but you should just keep on saying yes to all of them. I will explain the other options in further discussion but for now you should exit and restart with the disk still in the drive when the process is completed.
Walk through FDISK
|
|
When you are prompted with the A:\> type format C:, this will format your hard disk and will take 10 to 30 minutes depending on the size of the disk. What the formatting process is doing is creating the File Allocation Table (FAT) which keeps track of where files start and end as well as which sectors on the disk are bad. The format process also scans the disk for bad sectors and reports to the fat table to never use that part of the hard disk for file storage, is a file were to be stored there then the file would go bad as fast as you put it there.
Show how to format
|
|
Boot off of the disk and when prompted type install, but incase you are using DOS 6.x you would type setup and let DOS do its thing.
IMPORTANT! DOS uses a FAT16 and is limited to 2 Gigs of disk space per partition.
|
|
Windows 3.x is not a true operating system, instead it is a shield and requires DOS to be installed before its installation.
|
|
Now the disk is ready for you to install a Operating System or file storage as a slave disk drive. If it is an Operating System that you would like to install then you would use the installation disk and boot off of it, when prompted you would type the letter of your CD-ROM with the ": " after it and press ENTER.
For example, my CD-ROM has the drive letter of D so what I would type at the prompt would be D:\
Now type setup, press Enter,and windows will work its magic.
|
|
Home |
Contact us |
Our History |
Link to us |
Relations
A Passion Production ©opyright 2000